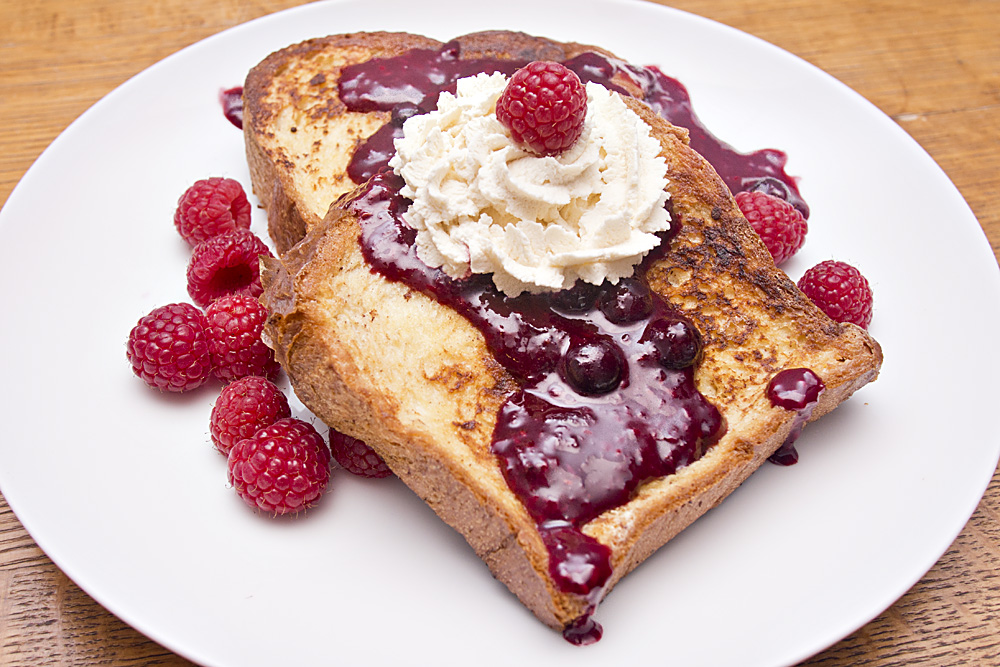
Behold, the Fabulous French Toast! It is crisp on the outside, soft and fluffy on the inside, and oh so flavorful.

The French toast is topped off with our tart berry compote and Kahlua whipped cream
First off, the method for the French toast is from Alton Brown. Check out this video, it will help you follow along. The recipe is of our own concoction.
French Toast Ingredients:
1 loaf of Challah (Hallah) bread, this is a Jewish egg based bread and it is key to this recipe.
6 eggs
2 cups milk
1 teaspoon cinnamon
1/2 teaspoon nutmeg
4 teaspoons Kahlua
4 teaspoons vanilla
The night before you are planning to make the French toast, beat the eggs, milk, and spices in a shallow resealable container, stash in the fridge.
On to the bread, still the night before, cut the Challah bread into 1/2 to 3/4 inch slices. You may have to hunt around town for this bread and you can expect some pretty strange looks from bakery boys when you ask for Challah (pronounced hallah), but it will all be worth it when you find this amazing bread! Leave the cut Challah on your oven rack with the door cracked open (NOTE: your oven is not on at this point, this is just a safe place to stash the bread while it is drying out).
Next comes the compote, we like to do this the night before but you can do it while you are making the toast. If you make it the night before just be sure to reheat it on the stove top before serving.
Tart Berry Compote Ingredients:
1 bag frozen raspberries
1 bag frozen blueberries
1/2 bag frozen strawberries (optional)
1/2 cup juice, cranberry or orange, whatever you have on hand
1 tablespoon of cinnamon
2 tablespoons of brown sugar
2 tablespoons of corn starch to thicken, add as needed, the pectin in the fruit will gradually thicken as well, so don’t go nuts with the corn starch.
1 tablespoon triple sec, or another orange flavored liqueur
1 squirt of lemon juice
Add all the ingredients to a medium saucepan over medium heat, stirring often until the raspberries have broken down and the sauce has thickened. This is a very simple recipe, feel free to play with it, when I make a compote I pretty much just throw what looks good in the pan and heat, it is always amazing.
Day of the French Toast Bliss:
Now that the long-awaited day of the French toast feast has arrived, let’s get cracking!
Get your Challah out of the oven and prepare your station for dipping. Set up a cookie rack over a baking sheet for the dipped bread to drain onto (at this point please watch Alton’s video).
Soak each side of the bread in the egg mixture for 30 seconds per side (be sure to give the mixture a whisk before dipping the bread). Move the soaked bread to the cookie rack.
Preheat the oven to 350 degrees.
The bread should rest on the cookie rack for several minutes, dip all the bread and then move on to the griddle stage. We like to use an electric griddle, but a large frying pan works fine. Heat the griddle to medium heat, melt a tablespoon of butter on each end of the griddle. Once the butter is bubbly, add the drained slices of toast, as many as you can comfortably fit on the griddle.
Cook each side 2-5 minutes until they are golden and crispy. Once each batch is done move them directly onto the rack of your preheated oven, bake for 5 minutes at 350 degrees. This stage ensures that the inside of the French toast is light and fluffy.
As the last batch of the French toast is baking, start your Kahlua whipped cream:
Kahlua Whipped Cream:
1 small container of heavy whipping cream
1-2 tablespoons Kahlua
Whip the two ingredients together until peaks form.
Serve the French toast with the warm tart berry compote and some Kahlua whipped cream.
Hope you enjoy!
Makes 10 pieces of French toast and a whole lot of compote.